|
The following is a step-by-step guide to adding a modem type not found in the list already provided within the Telogers for Windows program. Note: Some installations of Telogers for Windows do not reset the "read only" attribute on some files during installation - included in this is the "Modems.dat" file. If its flag remains set, Telogers for Windows can not modify the modem list. Before proceeding with the instructions below, locate this file (usually in "C:\Program Files\Telog Instruments\Telogers"), right-click on the file name, click on "Properties", and ensure the "Read Only" flag is unchecked. Click "OK".
When presented with the "Configurations Options" window, click on the "Communications" tab. Ensure the "Enable Remote Comm" is checked, and then click on the "Modem" button.
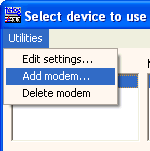
To complete this step, click on "Utilities", and select "Add Modem".
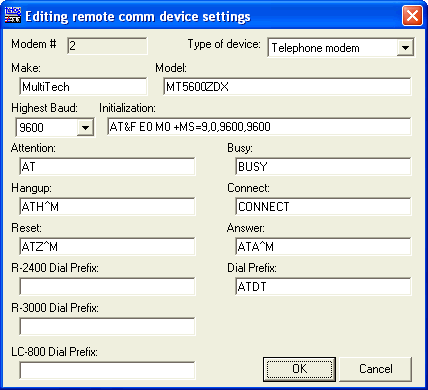
In the "Editing remote device comm settings" dialogue, enter the Make and Model of the modem. Next, ensure the "Highest Baud" is set to 9600, and enter the "Initialisation" string for the modem. This string is extremely important, especially if the modem is used for other activities e.g. Internet access. When done, click on "OK".
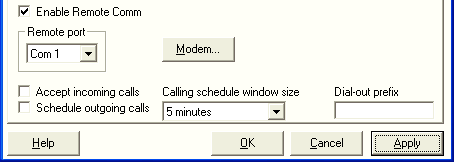
Click on "Apply", wait for the 'egg-timer' mouse pointer to disappear, and click the "Close" button (the Close button appears in place of "Cancel" when "Apply" is clicked). All the remains is to test the remote comms. Note: This web page does not form part of any official documentation. | | Email | © M.T.P. - 05.11.03 |
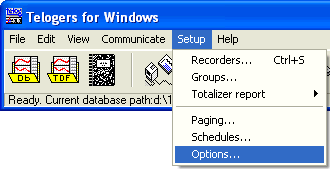 Start by invoking the Telogers for Windows software. Click on "Setup", and select "Options".
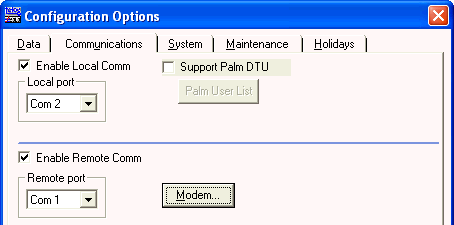
 At this time I personally prefer to delete all modems from the list so that only modems connected to the PC will be listed once the this procedure is completed. This is not a necessity and the choice, as they say, is yours.