|
Following is a 'step-by-step' guide to the setting up of the TCP/IP settings for a Reliable Power Meters' Power Recorder. Please note that the settings shown are for use with either a Netgear Analogue Router (RM356) or Webramp 310e. These are "default" settings and may change if used on other local area networks. Please consult your IT department if connecting your PR to your LAN-WAN system. |
Step 1
|
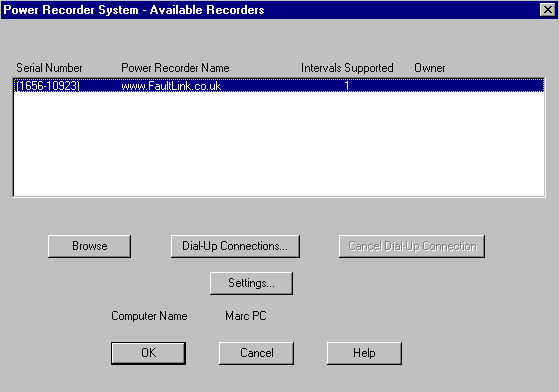
Step 2Within a short while a screen similar to the one shown below will appear.
Click on the "Settings" button. |
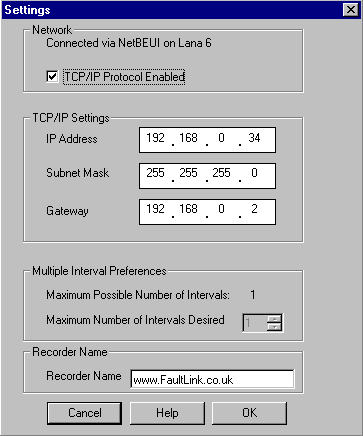
Step 3The following screen will be shown allowing the TCP/IP settings to be entered. Enter all the parameters as indicated below ensuring the "TCP/IP Protocol Enabled" check-box is ticked. Unless otherwise notified, please do not divert from the values shown.
Note: The IP address of 192.168.0.1 was previously used as the gateway IP address. It is advised to refrain from using this IP address for remote comms purposes as WinXP attaches special functions to this IP. When done, click OK. |
Step 4As you are making serious changes to the set-up of the Power Recorder the following warning screen is displayed. Before clicking on "Yes", it may be a prudent time to mention that any data recorded by the recorder is lost at this point. Everything is reset to defaults. Please ensure that you have downloaded any relevant data before executing this stage.
If you are happy about losing all your data, click on "Yes". |
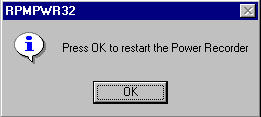
Step 5This stage may appear strange but what it is actually trying to tell you is that it's time to go for a cup of coffee. When clicking on "OK" it will appear as if everything has frozen........ it hasn't.
Click on "OK" and leave everything alone. Don't try to speed things up, you'll simply crash your system. Things are happening but only along the network. You should return to the listing of available recorders (as shown in step 2) in about 60 to 90 seconds after excecuting this step, just about enough time to go and grab that well deserved cuppa. When the list of available recorders is again shown simply click on OK and proceed as normal. TCP/IP is now ready for use when you next boot the recorder. NOTE: This webpage does not form part of any official documentation. |
| | Email | © M.T.P. - 08.06.04 |
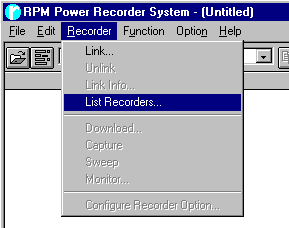
 Start the process by listing all the recorders on the local area network, this done by clicking on "Recorders" and then "List Recorders" as shown alongside.


